In today's fast-paced development landscape, having a consistent and reproducible environment is crucial. Vagrant provides a streamlined solution to this challenge. In this guide, we'll deploy a full-stack application environment using Vagrant, focusing on components like Nginx, RabbitMQ, Tomcat, and Memcache.
Vagrant is a tool for creating and managing virtualized (or containerized) development environments. It's a command-line utility that handles the lifecycle of virtual machines, ensuring that your development environment is consistent across your team.
- Consistency: Eliminate "it works on my machine" issues.
- Reproducibility: Destroy and recreate environments with ease.
- Isolation: Avoid conflicts between projects or different parts of the same project.
Before we delve into our application environment, ensure you have Vagrant and VirtualBox (or another provider) installed.
Our setup consists of several servers, each with a specific purpose:
A high-performance web server and reverse proxy. It receives web requests and forwards them to our application server (Tomcat).
A message broker that facilitates asynchronous communication between different parts of an application.
A Java application server where our primary application logic resides.
A caching layer that temporarily stores frequently used data, reducing the need for database queries.
Our relational database server where persistent data is stored.
With an understanding of our environment's components, let's begin our Vagrant setup.
In your project directory, run:
vagrant init
This creates a Vagrantfile in your directory, which is the configuration file for your Vagrant environment.
Edit the Vagrantfile to define each of our servers. For instance:
Vagrant.configure("2") do |config|
  config.hostmanager.enabled = true
  config.hostmanager.manage_host = true

### DB vm  ####
  config.vm.define "db01" do |db01|
    db01.vm.box = "eurolinux-vagrant/centos-stream-9"
    db01.vm.hostname = "db01"
    db01.vm.network "private_network", ip: "192.168.56.15"
    db01.vm.provider "virtualbox" do |vb|
     vb.memory = "600"
   end
    db01.vm.provision "shell", path: "mysql.sh"

  end

### Memcache vm  ####
  config.vm.define "mc01" do |mc01|
    mc01.vm.box = "eurolinux-vagrant/centos-stream-9"
    mc01.vm.hostname = "mc01"
    mc01.vm.network "private_network", ip: "192.168.56.14"
    mc01.vm.provider "virtualbox" do |vb|
     vb.memory = "600"
   end
    mc01.vm.provision "shell", path: "memcache.sh"
  end

### RabbitMQ vm  ####
  config.vm.define "rmq01" do |rmq01|
    rmq01.vm.box = "eurolinux-vagrant/centos-stream-9"
  rmq01.vm.hostname = "rmq01"
    rmq01.vm.network "private_network", ip: "192.168.56.16"
    rmq01.vm.provider "virtualbox" do |vb|
     vb.memory = "600"
   end
    rmq01.vm.provision "shell", path: "rabbitmq.sh"
  end

### tomcat vm ###
   config.vm.define "app01" do |app01|
    app01.vm.box = "eurolinux-vagrant/centos-stream-9"
    app01.vm.hostname = "app01"
    app01.vm.network "private_network", ip: "192.168.56.12"
    app01.vm.provision "shell", path: "tomcat.sh"
    app01.vm.provider "virtualbox" do |vb|
     vb.memory = "800"
   end
   end


### Nginx VM ###
  config.vm.define "web01" do |web01|
    web01.vm.box = "ubuntu/jammy64"
    web01.vm.hostname = "web01"
  web01.vm.network "private_network", ip: "192.168.56.11"
#  web01.vm.network "public_network"
  web01.vm.provider "virtualbox" do |vb|
     vb.gui = true
     vb.memory = "800"
   end
  web01.vm.provision "shell", path: "nginx.sh"
end

end
In this example, we've created a Vagrantfile to automate the setup of all the required servers: DB01, MC01, RMQ01, APP01, and WEB01.
With our servers defined, it's time to provision them. Run:
vagrant up
This command reads the Vagrantfile, creates virtual machines as defined, and runs the provisioning scripts.
To access a server, use:
vagrant ssh <server_name>
Replace <server_name> with the name of the server you defined (e.g., web01).
Let's understand the scripts that set up each server:
This script installs Nginx and configures it as a reverse proxy:
# adding repository and installing nginx
apt update
apt install nginx -y
cat <<EOT > vproapp
upstream vproapp {

 server app01:8080;

}

server {

  listen 80;

location / {

  proxy_pass http://vproapp;

}

}

EOT

mv vproapp /etc/nginx/sites-available/vproapp
rm -rf /etc/nginx/sites-enabled/default
ln -s /etc/nginx/sites-available/vproapp /etc/nginx/sites-enabled/vproapp

#starting nginx service and firewall
systemctl start nginx
systemctl enable nginx
systemctl restart nginx
The configuration forwards requests to our Tomcat server, allowing users to access our application via Nginx.
RabbitMQ installation and setup involve:
#!/bin/bash
sudo yum install epel-release -y
sudo yum update -y
sudo yum install wget -y
cd /tmp/
dnf -y install centos-release-rabbitmq-38
 dnf --enablerepo=centos-rabbitmq-38 -y install rabbitmq-server
 systemctl enable --now rabbitmq-server
 firewall-cmd --add-port=5672/tcp
 firewall-cmd --runtime-to-permanent
sudo systemctl start rabbitmq-server
sudo systemctl enable rabbitmq-server
sudo systemctl status rabbitmq-server
sudo sh -c 'echo "[{rabbit, [{loopback_users, []}]}]." > /etc/rabbitmq/rabbitmq.config'
sudo rabbitmqctl add_user test test
sudo rabbitmqctl set_user_tags test administrator
sudo systemctl restart rabbitmq-server
This establishes a RabbitMQ server with a test user for our application.
Memcache is installed and configured to cache frequently accessed data:
#!/bin/bash
sudo dnf install epel-release -y
sudo dnf install memcached -y
sudo systemctl start memcached
sudo systemctl enable memcached
sudo systemctl status memcached
sed -i 's/127.0.0.1/0.0.0.0/g' /etc/sysconfig/memcached
sudo systemctl restart memcached
firewall-cmd --add-port=11211/tcp
firewall-cmd --runtime-to-permanent
firewall-cmd --add-port=11111/udp
firewall-cmd --runtime-to-permanent
sudo memcached -p 11211 -U 11111 -u memcached -d
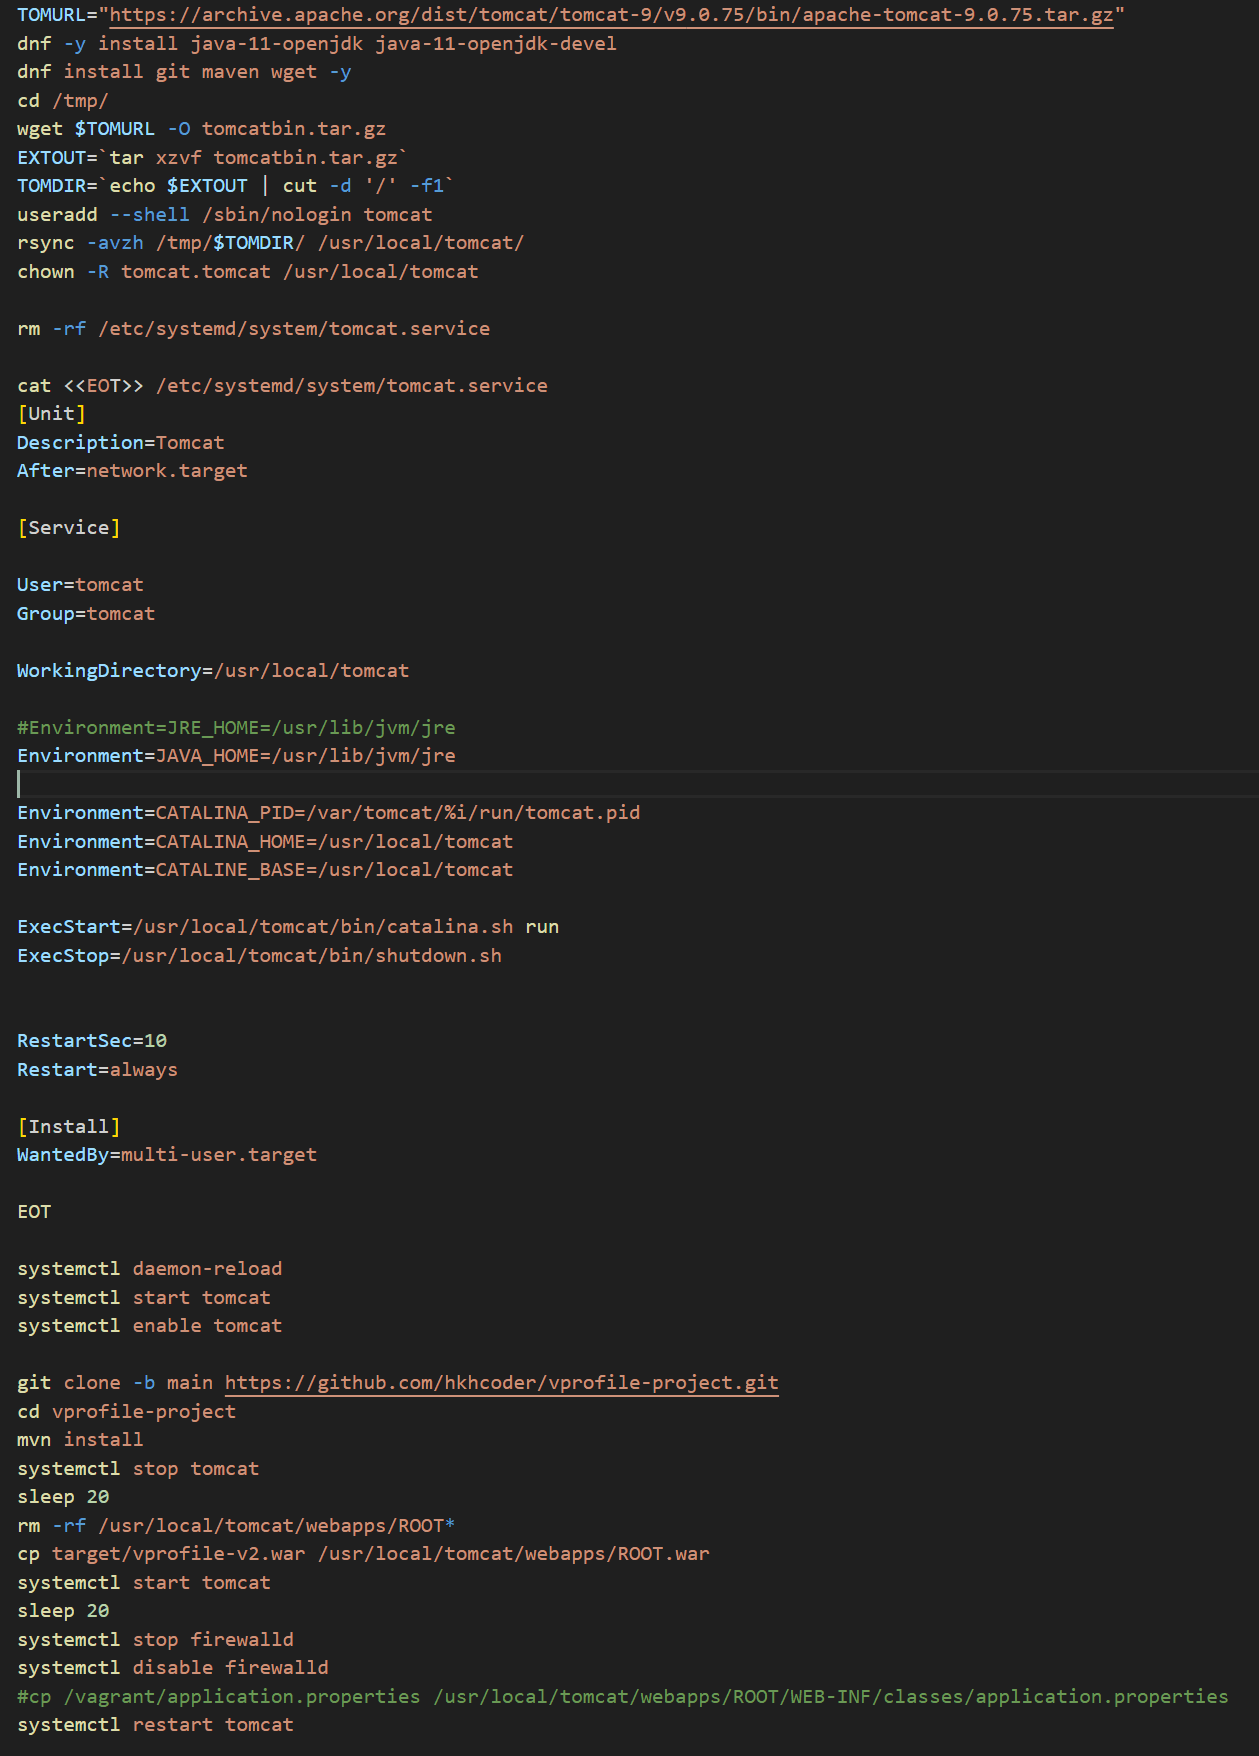
Tomcat is set up to serve our Java application:

This script installs Java, sets up Tomcat, and deploys our application.
With Vagrant, we've seamlessly set up a multi-server application environment. This ensures that every team member works in a consistent setup, enhancing productivity and reducing setup-related issues. Embrace Vagrant and elevate your development and testing processes!